Showing posts with label google. Show all posts

2009-05-15

Image

Add Google Ajax Feed To your Blogger Templates

blogger recent posts Ajax feed GoogleFirst of all, i want to give credits for New Blogger's (blogspot.com) recent posts widget using Google's Ajax Feed API to Hecto, i just modified the script to make it open in the same window, work with FeedBurner and a few other minor tweaks.

Now we can begin. You can see this New Blogger Recent Posts Widget using Google's Ajax Feed API in the right side of my blog. Move your mouse over it to see how it works.

1. You will need a key from Google which you can get in a second without any registration, by going to this link.

2. Go to your Blogger Dashboard > Layout > Edit HTML, check "Expand Widget Templates" and find: </head> and paste the following code above it


<!-- recent posts ajax -->
<script src='http://www.google.com/jsapi/?key=YOUR KEY' type='text/javascript'/>
<script src='http://www.google.com/uds/solutions/dynamicfeed/gfdynamicfeedcontrol.js' type='text/javascript'/>

<style type='text/css'>
@import url(&quot;http://www.google.com/uds/solutions/dynamicfeed/gfdynamicfeedcontrol.css&quot;);

#feedControl {
width : 353px;
margin-left : 1px;
background : white;
font-size: 13px;
float:left;
}
.gfg-title {
font-size: 17px;
border-bottom: 1px solid #307396;
font-weight: normal;
color : #BF0000;
background-color: #FFFFFF;
}
.gfg-title a {
color : #005580;
}
.gfg-root {
border: none;
font-family: Verdana,Arial,Helvetica,sans-serif;
background-color : white;
}
.gfg-list {
background-color : white;
}
.gfg-listentry-odd {
background-color : white;
}
.gfg-entry {
background-color : white;
width : 100%;
height : 7.5em;
position : relative;
overflow : hidden;
text-align : left;
margin-top : 3px;
}
.gfg-listentry-highlight {
background-image : url(&#39;http://nilarimogard.googlepages.com/garrow.gif&#39;);
background-repeat: no-repeat;
background-position : center left;
background-color : #F6F6F6;
}

</style>
<script type='text/javascript'>


function load() {
var homeUrl = &quot;<data:blog.homepageUrl/>&quot;;
var feed = homeUrl + &quot;atom.xml?redirect=false&quot;;
new GFdynamicFeedControl(feed, &quot;feedControl&quot;,
{linkTarget : google.feeds.LINK_TARGET_SELF, numResults : 5, title : &#39;Recent Posts&#39;});
}

google.load(&quot;feeds&quot;, &quot;1&quot;);
google.setOnLoadCallback(load);
</script>

<!-- /recent posts ajax -->

Change YOUR KEY with the key you got in point 1. The bold code above can be changed to suit your needs. numResults : 5 is the number of posts in this widget, change the number to the number of posts you want to show up in your recent posts widget. title : 'Recent Posts' can also be changed with the title you want for your widget, or you can remove title : 'Recent Posts' if you want your feed's default title to be displayed.

3. Create a new "HTML/JavScript" widget, then add this line to the content:


<div id="feedControl">Loading...</div>

Save it and you're done.

Customizing the recent posts Ajax widget


To change the font, colors and so on of your widget, modify the CSS styles:


#feedControl {
width : 353px;
margin-left : 1px;
background : white;
font-size: 13px;
float:left;
}
.gfg-title {
font-size: 17px;
border-bottom: 1px solid #307396;
font-weight: normal;
color : #BF0000;
background-color: #FFFFFF;
}
.gfg-title a {
color : #005580;
}
.gfg-root {
border: none;
font-family: Verdana,Arial,Helvetica,sans-serif;
background-color : white;
}
.gfg-list {
background-color : white;
}
.gfg-listentry-odd {
background-color : white;
}
.gfg-entry {
background-color : white;
width : 100%;
height : 7.5em;
position : relative;
overflow : hidden;
text-align : left;
margin-top : 3px;
}
.gfg-listentry-highlight {
background-image : url('http://nilarimogard.googlepages.com/garrow.gif');
background-repeat: no-repeat;
background-position : center left;
background-color : #F6F6F6;
}

To change the red arrow, save this image: http://nilarimogard.googlepages.com/garrow.gif, edit it with the color you want and upload yours to some host, then change it in the above code.

You cand find all the CSS elements for the Google Feed API, here.

For further documentation regarding the Google Feed API, visit it's homepage.


Image

Create and Change your own Gmail Theme


Recently Google Introduces themes for Gmail, and if you are bored with those themes. So now you can create your own Custom theme for you Gmail Box easily. You can now make Gmail as ugly or pretty as you want – by choosing your own colors. Go to Gmail -> Settings -> Themes, and click “Choose your own colors”. This opens a window where you can configure a template with instant preview. Hit Save & Close, and Gmail will appear in your custom colors.

Your colors are saved when you finish editing the theme and the changes are added to Gmail after you press “Save”. If you don’t like your theme, you can always choose one of the 31 pre-defined thems or click on “Reset” to go back to the default theme. And you still want to customize Gmail than you have to try Change the Look of Gmail with Firefox Addon

Image

Change the Layout of Gmail with Firefox Addon

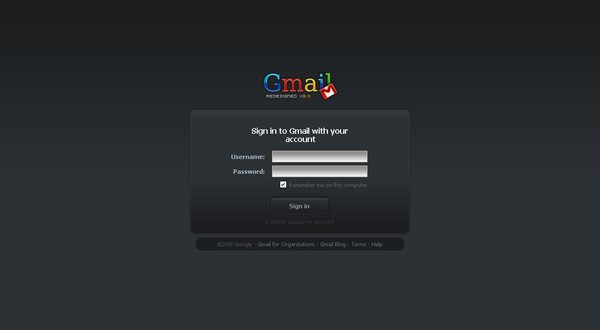
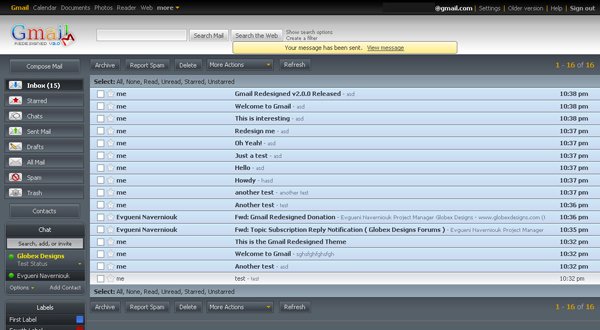
If you are bored from the skin of GMAIL and Want to change it, than you have to try the Firefox Addon Google Redesigned. Google Redesigned is a Mozilla Firefox extension designed by Globex Designs that aims to fully redesign the look and feel of popular Google services. This is achieved with Cascading StyleSheet (CSS) files which are loaded on the client’s browser.
 
 
Google Redesigned is built for Mozilla based browsers (Firefox, Flock, IceWeasel, and such). Users using other browsers will not be to install the extension. Firefox 3 and Flock 2 are highly recommended as certain styles will not work correctly on older versions of the Gecko engine. As well the Firefox 3 engine provides much faster performance for handling these styles.
Download FireFox Addon Gmail Redesigned


2009-05-06

Image

SyntaxHighlighter for Blogger

SyntaxHighlighter can insert colored code snippets on a web page. It helps a developer/coder to post code snippets online with ease and have it look pretty. It's 100% Java Script based and it doesn't care what you have on your server.

Download SyntaxHighlighter and follow the steps given below to set up it in your blog.

Extract the files and host it somewhere in the web. Google Page Creator can be used for this purpose.

No need to add all the files. Just upload the javascript files of the programming languages you use.


Login to Blogger and Go to Layout > EditHTML. Check Expand Widget Templates.

Add the code given below between the <head> and </head> section of your template.


<link href='http://[YOUR OWN PAGE].googlepages.com/SyntaxHighlighter.css' rel='stylesheet' type='text/css'/>
<script src='http://[YOUR OWN PAGE].googlepages.com/shCore.js' type='text/javascript'/>
<script src='http://[YOUR OWN PAGE].googlepages.com/shBrushCpp.js' type='text/javascript'/>
<script src='http://[YOUR OWN PAGE].googlepages.com/shBrushCSharp.js' type='text/javascript'/>
<script src='http://[YOUR OWN PAGE].googlepages.com/shBrushCss.js' type='text/javascript'/>
<script src='http://[YOUR OWN PAGE].googlepages.com/shBrushDelphi.js' type='text/javascript'/>
<script src='http://[YOUR OWN PAGE].googlepages.com/shBrushJava.js' type='text/javascript'/>
<script src='http://[YOUR OWN PAGE].googlepages.com/shBrushJScript.js' type='text/javascript'/>
<script src='http://[YOUR OWN PAGE].googlepages.com/shBrushPhp.js' type='text/javascript'/>
<script src='http://[YOUR OWN PAGE].googlepages.com/shBrushPython.js' type='text/javascript'/>
<script src='http://[YOUR OWN PAGE].googlepages.com/shBrushSql.js' type='text/javascript'/>
<script src='http://[YOUR OWN PAGE].googlepages.com/shBrushVb.js' type='text/javascript'/>
<script src='http://[YOUR OWN PAGE].googlepages.com/shBrushXml.js' type='text/javascript'/>
<script src='http://[YOUR OWN PAGE].googlepages.com/shBrushRuby.js' type='text/javascript'/>

Add the code given below just before </body> tag.

<script language='javascript'>
function start() {
dp.SyntaxHighlighter.BloggerMode();
dp.SyntaxHighlighter.HighlightAll('code', true, true, false, 1, false);
}
window.onload = start;
</script>

Save Template and you're done.


Placing the code in the post editor

Place your code on the page and surround it with <pre> tag. Set name attribute to code and class attribute to one of the language aliases you wish to use.

<pre name="code" class="c-sharp">
... some code here ...
</pre>


One important thing to watch out for is opening triangular bracket <. It must be replaced with an HTML equivalent of &lt; in all cases. Failure to do won't break the page, but might break the source code displayed.


An alternative to <pre> is to use <textarea> tag. There are no problems with < character in that case. The main problem is that it doesn't look as good as <pre> tag if for some reason javascript didn't work.

<textarea name="code" class="c#" cols="60" rows="10">
... some code here ...
</textarea>


Extended configuration

There's a way to pass a few configuration options to the code block. It's done via colon separated arguments.

<pre name="code" class="html:collapse">
... some code here ...
</pre>


2009-05-01

Image

Google Blogger For Dummies (2009)

Details for Google Blogger For Dummies (2009)

Google Blogger For Dummies (2009)

More than 14 million people are promoting a business, connecting with family and friend, and sharing opinions with Google Blogger. This book helps you start a Blogger account, create content, build an audience, make money with your blog, and more, all without learning to program. You’ll be able to:

* Learn the parts of a blog, what Blogger does, and how to choose goals and blog topics
* Choose a domain name, learn to use the dashboard, pick a template, and configure settings
* Dress up your blog with themes and find out where to get plenty of free ones
* Learn blogging etiquette and some secrets for long-term success
* Make money from your blog with Google Adsense, contextual and text link ads, and merchandising with CafePress
* Set up multi-user blogs or branch into mobile blogging, podcasting, or video blogging
* Take advantage of social networking sites and learn simple search engine optimization techniques
* Maintain your blog with tools like Blog This! and Quick Edit

Download


Total Pageviews