This time, we'll try to customize them a bit. This is optional, of course. You will learn how to:
► control the style of your new footer
► add some colors to it
► change the link color (footer links can be in different color than the main link color)
► customize links
► change the headings style....
In the This tutorial, you've placed a CSS style + some HTML. Now, all we're going to do is a simple play (tweak) in CSS (style). If you're ready, let's do this....
ADDING BORDERS
The simplest thing to do, but can produce a great effect. By default, you have a top border (1px dotted) that divides footer from the content area.
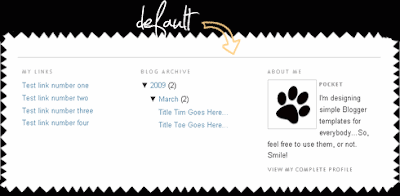 You can change the border style in this part of CSS:
...tweaking the line in pink. Options:#footer-columns {
border-top:1px dotted #999999;
clear:both;
margin:0 auto;
}
border: 1px dotted #999999; ► add a border around the whole footer container
border-bottom: 1px dotted #999999; ► place a border at the bottom
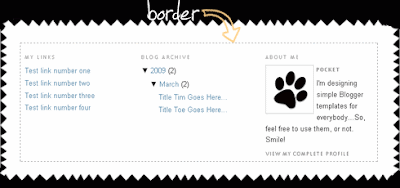 You can also change the border style (dotted, solid, dashed...), width (1px. 2px, 3px....) and color (any hex color you like, starting with #).
***
ADD A BACKGROUND
Hm. Adding a backgound in the footer container is great, but you'll have to work more on this. Why? Well, because when you add a different background that your Blog already has, you'll have to change the text color and links...We'll discuss this too.
When adding a background, you can either:
► colorize it (quite simple)
► or place the picture as a background (tiled, or repeated vertically...)
::Color as background::
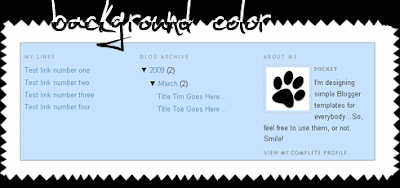 To add a background color to your Footer, add this line to your #footer-columns in CSS:
background:#C6E2FF;
...change the #C6E2FF to any hex color you like...The CSS should look like this, after placing the line:
...border if optional. You can combine border and background.#footer-columns {
background:#C6E2FF;
border-top:1px dotted #999999;
clear:both;
margin:0 auto;
}
::Picture as background::
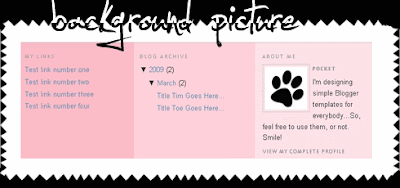 This is more fancy. You can make something like I've did for this tutorial, or place any kind of background you'd like (patterns, images, lines....).
My suggestion is to place the pics (patterns) that will repeat (tile). Because your Footer will stretch (in height) to fit your content (gadgets)...
Steps:
1. Identify (measure) the width of your Blog (outer-wrapper, or under different name....). You will find this in your LAYOUT ► EDIT HTML. For my example (I've used Minima default template) I've checked the width here:
..there's the width, in orange...660px.#outer-wrapper {
width: 660px;
margin:0 auto;
padding:10px;
text-align:$startSide;
font: $bodyfont;
}
2. Next thing is to create the background pic. I use Photoshop, but any decent Graphic editor will do. You can do this in Paint. So, here's my pic:
You have to make the pic the same width as your Blog (660px in my case), cut the 1px-5px part. Your pic will repeat vertically. The smaller the part is, faster loading time you get.
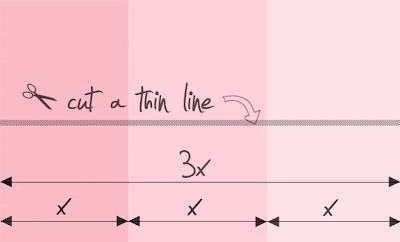 Always work in RGB mode, and export pics for web (or save as .gif, or .png) to keep the quality.
3. Upload the pic to a free web host, like Tinypic.com, Photobucket.com....You need to copy the Direct Link of your uploaded picture.
4. Place the picture in the CSS style in your code. Go to LAYOUT ► EDIT HTML, find your #footer-columns style, and add the line in orange:
...border is optional. You can either remove it, or combine with background.#footer-columns {
background:url(http://i39.tinypic.com/10wijch.jpg) repeat;
border-top:1px dotted #999999;
clear:both;
margin:0 auto;
}
...replace http://i39.tinypic.com/10wijch.jpg with the URL address (Direct link) of your pic..
...this is just an example, you can play, combine, try different things...
***
CHANGE THE HEADINGS IN FOOTER
By default, you'll have the widget (gadget) headings just like the ones in the sidebar. If you'd like to make a custom ones, read on.
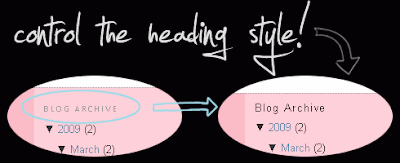 First, we have to add some style to the CSS of #footer-columns. So, locate this part in your code:
...yours may be a slight different, if customized.#footer-columns {
border-top:1px dotted #999999;
clear:both;
margin:0 auto;
}
Place the code in pink UNDER it, so it will look like this:
...customize the font, colors, size, margins, letter spacing, weight...#footer-columns {
border-top:1px dotted #999999;
clear:both;
margin:0 auto;
}
#footer-columns h2 {
margin:5px 0 5px;
font-family:arial;
font-size:13px;
font-weight:normal;
line-height: 1.4em;
text-transform:none;
letter-spacing:.1em;
color:#000000;
}
You can also place an icon in the heading, add a background, borders...We'll talk about this more in other tutorial.
***
CHANGE THE LINK COLOR IN FOOTER
Why? If you customize your Blogger footer (add a background color), your Links may not be visible. Links in Blogger carry the same style in the whole template elements. In my example, I have the default Links in blue, but I want them to bee more brown-ish.
 So, UNDER this part of code:
...in pink, you can adjust the colors of active link (a), visited link (a:visited) and hovering effect (a:hover)#footer-columns {..you will place this one:
border-top:1px dotted #999999;
clear:both;
margin:0 auto;
}#footer-columns a {
color:#8B4513;
text-decoration:none;
}
#footer-columns a:visited {
color:#CD6839;
text-decoration:none;
}
#footer-columns a:hover {
color:#8B4513;
text-decoration:underline;
}
...in orange, you can change the text-decoration (underline, none, italic...)
...you can play with styles and link effects...this is just to get start with...
***
CHANGE THE TEXT COLOR IN FOOTER
This will change the text color in your footer (not the Links, but everything else). Add the line in orange to this part of code:
...adjust the color to whatever suits you...#footer-columns {
border-top:1px dotted #999999;
clear:both;
margin:0 auto;
color:#000000;
}
Ok, that's quite enough for now. We'll discuss Links customization and icon placement in next tutorial....

0 التعليقات: