Here's how.
NOTE: BACKUP YOUR TEMPLATE!
1. Go to Layout. Edit HTML.
2. Make sure that the "Expand Widget Templates" checkbox is UNCHECKED.
3. Look for this line of code:
<b:widget id='Followers1' locked='false' title='' type='Followers'/>
4. Replace the above code with this:
<b:widget id='Followers1' locked='false' title='' type='Followers'>
<b:includable id='main'>
<b:if cond='data:title != ""'>
<h2 class='title'><data:title/> (<data:totalFollowerCount/>)</h2>
</b:if>
<div expr:id='data:widget.instanceId + "-wrapper"'>
<br/>
<div class='followerbox'>
<b:if cond='data:followingLinkPresent'>
<div class='follow-this profile-link item-control following-follow-this'>
<a class='followthisblog' expr:href='"javascript:_FollowersView._openPopup(\"" + data:followUri + "\");"'>
<data:followThisMessage/>
</a>
</div>
<div class='follow-this profile-link item-control following-stop-following-this'>
<a class='followthisblog' expr:href='"javascript:_FollowersView._openPopup(\"" + data:followUri + "\");"'>
<data:stopFollowingMessage/>
</a>
</div>
</b:if>
<div class='followers-grid'>
<b:if cond='data:totalFollowerCount == 0'>
<div class='profile-link item-control following-follow-this'>
<data:emptyFollowersMessage/>
</div>
</b:if>
<!--
Relies on the js written out in navbar.gxp
-->
<b:loop values='data:followers' var='follower'>
<div class='follower'>
<a expr:href='data:follower.profileUrl' expr:title='data:follower.displayName' rel='nofollow'>
<img class='follower-img' expr:alt='data:follower.displayName' expr:height='data:follower.imageHeight' expr:onerror='"this.onerror=null;this.src=\"" + data:anonFollowerImageUrl + "\";"' expr:onload='"setAttributeOnload(this, \"src\", \"" + data:follower.imageUrl + "\")"' expr:width='data:follower.imageWidth' src='http://img1.blogblog.com/img/blank.gif'/>
</a>
</div>
</b:loop>
<div class='clear'/>
</div>
<div class='followers-canvas profile-link'>
<data:followersFooterMessage/><br/>
<span class='item-control following-not-admin'>
<a class='showallfollowers' expr:href='data:followersUri'>
<data:viewAllMessage/>
</a>
</span>
<span class='item-control blog-admin'>
<a expr:href='data:manageFollowersUri'>
<data:manageFollowersMessage/>
</a>
</span>
</div>
<b:include name='quickedit'/>
</div>
</div>
</b:includable>
</b:widget>
Now, for the CSS part.
(1) Before the closing tag of
]]></b:skin>
</head>
place the following codes:
.followerbox {
text-align: center;
width: 200px;
background-color: #ffffff;
border: 6px ridge #1566a7;
}
.followthisblog {
font-weight:bold;
font-size:16px;
}
.showallfollowers {
font-size:11px;
}
(2) Save template.
(3) View Blog.
An explanation on the CSS Part.
.followerbox {
text-align: center;
width: 200px;
background-color: #ffffff;
border: 6px ridge #1566a7;
}
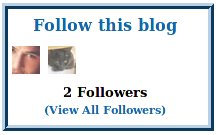
The "followerbox" class pertains to the div where the whole Followers widget was placed. Here, you may adjust how wide or how long you prefer your widget to be, apply background color and even borders.
.followthisblog {
font-weight:bold;
font-size:16px;
}
.showallfollowers {
font-size:11px;
}
The "followthisblog" and "showallfollowers" classes pertain to the anchor link properties where you may change how the "Follow this blog" and "View All" texts would appear.
Change the VIEW ALL text
If you want to change the "View All" text, just look for this line of code:
<data:viewAllMessage/>
and replace it with the text of your choice.
Add Image Opacity Effects
If you want to have an image opacity onhover effects like the one on my Followers widget, follow this three simple steps:
(1) add this line after the css properties declared earlier:
a.followeropacity img {
filter:alpha(opacity=70);
-moz-opacity: 0.7;
opacity: 0.7;
}
a.followeropacity:hover img {
filter:alpha(opacity=100);
-moz-opacity: 1.0;
opacity:1.0;
}
You may adjust the opacity value from 0 (lightest) to 100 (normal) according to your preference.
(2) CHECK the "Expand Widget Templates" and look for this line of code:
<a expr:href='data:follower.profileUrl' expr:title='data:follower.displayName' rel='nofollow'>
(3) Replace it with this:
<a class='followeropacity' expr:href='data:follower.profileUrl' expr:title='data:follower.displayName' rel='nofollow'>
The bold-faced text was the css class inserted.

0 التعليقات: